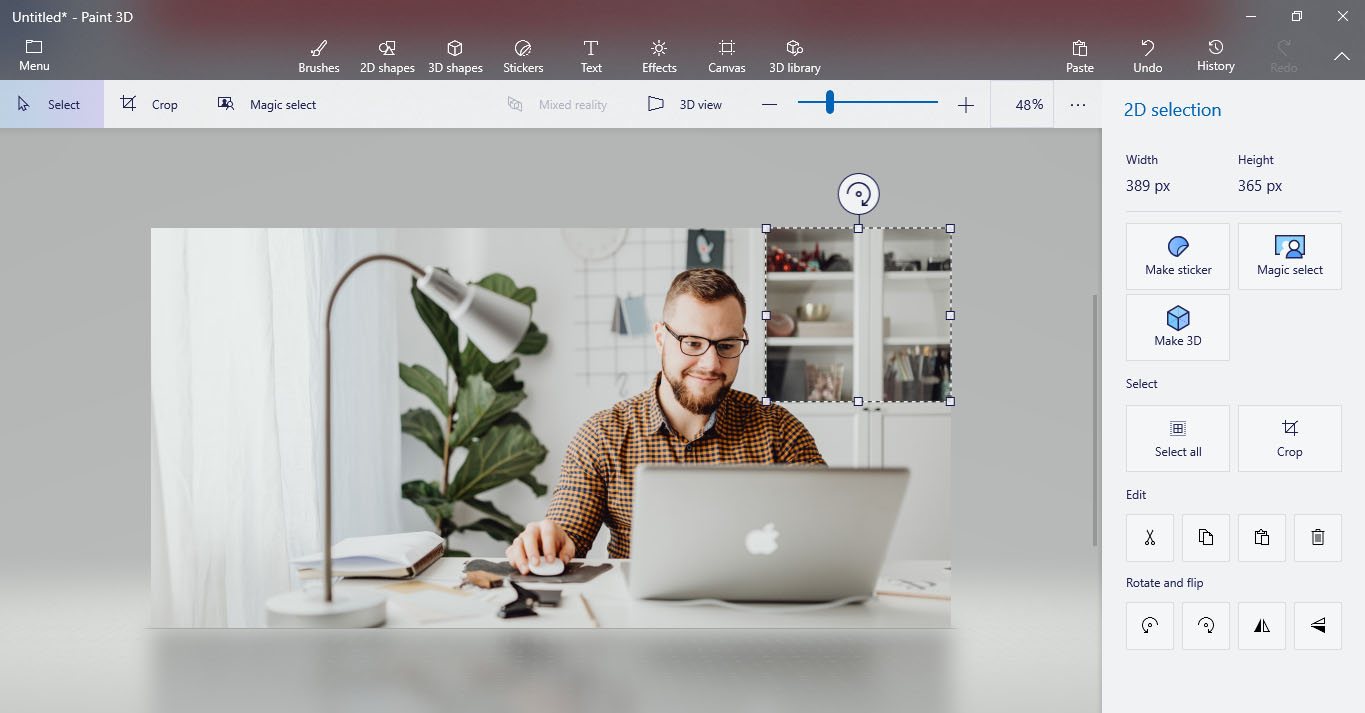
Although there are numerous ways to blur a picture in Paint 3D, we are going to be seen you how to use the Select tool to blur any picture.
How to Blur a Picture Using the Select Tool in Paint 3D?
Paint 3D is a Windows application that allows users to create, edit, and manipulate images in a 3D space. Here are the steps to blur an image using the select tool in Paint 3D:- Open Paint 3D on your Windows computer.
- Click on "New" to create a new project or open an existing image by clicking on "Open"
- Import the image you want to Blur by clicking on "Insert" and selecting "Image"
- Use the select tool to select the area of the image that you want to blur. The select tool is located in the toolbar on the Top of the screen.
- Once you have selected the area, click on "Effects" in the toolbar and select "Blur" from the dropdown menu.
- Use the slider to adjust the blur intensity. You can preview the changes in real-time by checking the "Preview" box.
- Click on "Apply" to apply the blur effect to the selected area.
- Save your picture by clicking on "File" and electing "Save" or "Save As"
That's it! You have successfully blurred an image using the select tool in Paint 3D.


No comments
Post a Comment